Thursday, May 30, 2013

Baby Chicken Brooder

Well, hubby and I thought it would be fun if we documented the start of the whole chicken raising process that we are going through.  We recently built the brooder, this is where they will spend their first month or so.
Then we will build a nursery/breeder, and then the real coop (which will be movable around the yard as well as when we move from the house we are renting).  The Brooder turned out amazing!  Much better than I thought it would, but, as you can probably guess, hubby designed it and he's so smart and a real thinker.  So here we go.

Okay, here is what the inside of part of the top looks like.  We designed it so that the top can slip onto the other pieces to hold it all together, then we don't have to worry about things getting inside it and its all one piece.

These are the two pieces that comprise the top of the brooder.  We used a lot of 2x2 to make the forms and some other boards, they look like 1x4.  The whole brooder will be 4 foot by 4 foot, and I think 2 feet tall.  So, we just got 8 foot and 12 feet lengths of wood and cut it with the saw.  We put those little triangles of excess wood that we had leftover from the garden stakes to add some extra support for the door.  

The top is done!  Only one side of the top opens, so we used hinges to attach that securely.  On the right, there is a latch that we will use to keep the door down, so that if any critters do get in the garage they shouldn't be able to access the babies.

We thought about using chicken wire and screen (for mouses), but we found this kind of mesh stuff at Lowe's and decided to go this direction.  We got a heavy duty upholstery stapler to attach it to the door, which worked a heck of a lot better than nailing staples in.  Also, we used a nail gun run by a cute tiny air compressor, and it sure did a fantastic job and made quick work of the whole brooder.  We only used real screws in a few places and almost a full bottle of wood glue.
We have the one side of the top open to let out some of the heat from the heat lamps and give the chicks a cool place to be, otherwise they would probably melt and it wouldn't be good for them.  This way, if they are cold (which I doubt will be the case) they can hang out under the heat lamp or they can run to the different parts of the brooder.  They're actually really smart little animals.  

Here is the base of the brooder put together with screws.  We have made it so that it will come apart and store well so when we have little chick babies again we can put it back together and use it again.  We put a little hole on one side in the 1x4 near the top so that we could run the cord for the heat lamp and that it wouldn't cause problems with the door.  Then hubby got a nail and made a hook on the top part so that we can hang it with some wire.

This is with the top resting on it.  It's so freakin' awesome!  I'm so excited!!!!  It is by far our best brooder that we have ever made (probably the most expensive too, but we're not talking about that).  Plus it is just so light and easy to handle.  Excellent!

We decided to paint it green.  I hate painting.  The paint is a cool dark green, its by Olympic, and its called (I wanna say) Dark Green Velvet, but that seems silly...it had green velvet in it, I know that much.  My memory is sooo bad!  Ugh!  Here's the painted top part...

And the four sides..
Oh yeah, we decided to paint it because, number one, it looks really cool and really good, and if we are going to use it again it might as well be nice.  And number two, painting it should help it last a lot longer in the stupid humidity that we have out here.  Theoretically anyway, its just a guess, we don't know!  But it feels right, so we'll go with it!

We pick up the baby chicks from Murray McMurray Hatchery on Saturday Morning, June 1!  We are sooooo excited!  Saturday!!!!!!!

Bedtime.  xoxo

Garden: week 3

I took all these pictures on Wednesday in the 5 minutes that it wasn't raining...Its been raining a lot the last week or two.  Good: I don't have to water the garden and its not bzillion degrees outside.  Bad: it makes
playing outside less likely and less fun.  Here is where we can see just how dorky I am.

Look, there's a little yellow flower on my tomato plant that is not a dandelion!!! Yay!  Doesn't it look like a happy little tomato plant? :)

I should have deleted this picture because my finger got in the way, but now I just think its funny...Can you find it?  (I'm pointing to to the cucumber plant...haha!) 

My potatoes are flourishing!  I've never grown potatoes but I'm so excited!

The Bibb lettuce.  I'm still not sure how this is going to taste, what the texture is like, or when to harvest...granted I know I'm pretty far from harvesting anything, but I should probably learn more about this lettuce.  Which I might feature in the next garden update.

My peas!  Yay!  I love fresh peas!

I'm not sure what happened.  I planted a whole package of bush beans and I think I only have 2 that sprouted and are doing anything.  I just don't know!!  Oh well!

Carrots!  I'll definitely have to thin them out when they get bigger!  I've heard of someone (my dad maybe) that mixes the seeds in with sand so that you don't bunches like this and so they are better spread out.  I might do that next time.

My strawberries!  Look at all the strawberries in there!!!!!!!!!  And the one looks like it has a hint of pink on it today, I'm so excited!  And they're getting big!  Yay!

And my Hens and Chicks.  They're not part of the garden, but I think they're cute!  :)  I'm hoping they will fill up the container!

xoxo

Wednesday, May 22, 2013

Garden: week 2

And now, friends, its time for another good idea bad idea.  I mean, good news bad news. :)
So far, the garden is going really well!  ...except for the one thing...you'll see at the end of the post. I took these pictures yesterday morning before I watered it all.  
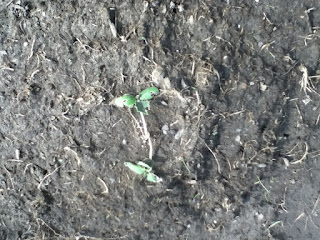
The angle is weird, but I think these are the peas.  

The baby carrots...aren't they cute?

The watermelon..

White potatoes...

Yes!  The cucumber...

I think this is the Bibb lettuce, I think its upside down.. (sorry)

And the bad news...this is the other cucumber plant.  :(  But, it looks like there is another leaf on it that wasn't there before so maybe....(probably not).

And, introducing: The raspberry project.  
I haven't heard of too many people (that, or I haven't looked it up well enough) that have planted raspberries in containers, so I thought I'd give it a try.  I also am going to plant strawberries and "hens and chicks" in pots too, but I've heard that they both do really well, but I'm not sure about the raspaberries (I like calling them raspaberries instead of raspberries).  Here they are, in all their glory, I just planted them in the pots last night while youknowwho (hubby) mowed part of the lawn.  They are Caroline Everbearing Raspberries, they produce a large sweet tasting red raspberry, according to the tag on the pot.  
The soil I've used in the pots is a third potting soil with fertilizer, a third garden soil with fertilizer, and a third peat moss.  (All of which can be found in bags at the garden center at Lowe's.)  

Wildlife update: I saw a huge squirrel and a brown rabbit.  We saw 2 Canadian geese the other day too in the corn field.  And we saw a cardinal (the bird) in our driveway during the rain today, man, they are beautiful!  Last week, too, I saw what looked like a yellow finch (bird).  Seeing all these birds and animals is just soooo cool!  :)

xoxo

No 'poo and the humidity

So, not sure if some of you remember, but I have been doing this thing where I don't use shampoo or conditioner, I use baking soda and vinegar instead.  Baking soda is a cleanser and the vinegar helps condition it.

Ever since we moved moved from Utah to Iowa my hair has not felt right.  It felt oily and thick and just really gross, even after "washing" it quite a bit.  I found this blog and post, Code Red Hat where she talks about two different methods of the no shampoo shampoo.  The first is what I've been doing for 7 months now (really its been that long, wow!).  1 tablespoon of baking soda mixed with a cup of water as your shampoo and 1 tablespoon of apple cider vinegar mixed with a cup of water as your conditioner.  In a desperate move to get my hair back to the soft wonderfulness that it was before we moved here I decided to try method 2.  Here it is: have a small container of straight baking soda in a waterproof container in your shower.  When you are ready to shampoo, get your hand wet, put about a tablespoon of baking soda in your hand and make it into a paste.  Use this paste and apply it to the base of your roots and just get it everywhere, applying in a circular motion.  Go ahead and finish washing and let the baking soda hang out on your head.  After you are done make sure all the soda has dissolved and you feel your hair being slippery.  I know now what she means by "slippery" feeling, I never really noticed before.  Then rinse really well!  She also suggested (for the conditioner) to use apple cider vinegar for dry to normal hair and white vinegar for normal to oily hair.  I hadn't ever heard that part before so I figured I'd give white vinegar a try.  VOILA!  I tried the straight baking soda and the white vinegar and my hair is back, Jack!  I'm so excited!  I don't know what it is about being here, I wonder if its the well water that we use in this house, or if it is the humidity or what (probably the humidity), but before we moved here my hair was just fine, soft and springy and it was awesome.  Well, its awesome again and feels clean and wonderful.  I don't think I'll ever go back to regular shampoo again, it feels so much cleaner, I know its weird, but it really does!  And by the way, I hardly ever smell the vinegar, even in the shower and definitely not on my hair.  And here's a pic just for fun, I need a smaller container for the baking soda, but this'll do!  :)
Beautiful, huh?!
xoxo

Tuesday, May 14, 2013

My new baby garden and an announcement!

Hi!  Hubby and I recently moved (like 3 weeks ago-ish) from Utah to the great state of Iowa.  He finally graduated college with an engineering degree, I am so proud of him, he did so well and got straight A's most of the time!!  We found a big old farm house to rent (built in 1880s and it is huge, with 4 bedrooms and plenty of space).  The house is surrounded by corn fields and neighbors that live 2 standard blocks away, if not farther.  We are loving it!  How can you beat this as your front yard (that is not my house-its part of the farm).

And this as your back yard!
Now that I look at that picture the clouds in the distance look grumpy, I wonder what that means.  In this back yard, we saw 30 deer our first night, which greatly surprised and excited us, but apparently its not unusual to see deer here all the time.  I was talking with the dude that hooked up our satellite service and he said that people come here to hunt all the time, that someone got a 16 point buck one time...or that its not unusual to see deer that big..or something like that.  The first time it rained for 3 days I looked out the window and saw some wild turkeys running around out there, and when I took these pictures, there were like 6 to 8 out there playing in the cornfield.  Its so neat seeing wildlife!  I might've seen a dead possum in the road...AND, as part of my brand new bug adventures, there were ladybugs everywhere, but they got taken over by box elder bugs.  I HATE BOX ELDER BUGS!!!!!!  THEY ARE SOOOOO GROSS!

Does anyone want some pretty little yellow flowers? (dandelions)  But most people don't water their lawns out here, so I don't think people here mind.  Weird.  

Which brings me to...my new baby garden!  It looks kind of sad, but I just planted it last night!  I'm not a real good gardener, so we'll use this year as kind of a practice run.  I think that the deer and birds are probably going to eat more of it than we will, but its worth a try anyway!
 It measures 16 feet by 16 feet.  Hubby got excited with the tiller, so we have some grass to fill in in some spots. :) And I'm not a real good row maker so I just kinda water the whole thing and hope for the best, which probably isn't the best way to do things, but we'll see what happens!
 I planted: a few yellow onions, cucumbers, sugar baby watermelons, early girl tomatoes, bibb lettuce, iceberg lettuce (I got the bibb kind on accident but figured what the heck), white potatoes, bush beans, sugar snap peas, and carrots.  I think that is it!  I'm pretty excited that the cages I got for the tomatoes are pink and red.  Yay!  I also have a 6 pack of strawberries that I am going to plant in a plastic bucket thing that I got from Walmart today.  We want to plant them in a container so that when we move from this house we don't have to leave them here.  We wanted to do raspberries too, but I couldn't find any at the store.  Maybe its the wrong time?  Are you supposed to plant them in the fall?  Hmm...

And last, but not least (as far as the pictures go), I got chicks and hens that will soon be planted in this adorable chick pot.  I'm so excited!  I love chicks and hens!!!

Along those same lines.....WE ORDERED OUR BABY CHICKS YESTERDAY!  We are getting 22 of them!  They will be available for pickup on June 1!  Because we live only a couple of hours away from Murray McMurray Hatchery we decided to pick them up from the facility rather than have them mail them to us.  WE ARE SO EXCITED!!!!!!!  We are going to build their brooder here soon, in which they will live for about a month.  Then we are going to build a smaller coop that should only cost a few hundred dollars that they can live in for a couple of months, by then we should be in a better financial situation so we can build the real coop.  They will all be portable so that we don't leave any more coops behind.  Then, when we decide to breed our chickens we can put a pair in the smaller coop so that we can keep them separate. ;)

Monday, May 6, 2013

Clean stove grills

So, I found this thing on Pinterest about how to clean the grills on your gas stove.  You put the grills in a gallon bag with 1/4 cup of ammonia and let it sit for 12 hours (outside is best), scrub a little bit, and your done.  Since we were moving and cleaning the apartment from top to bottom, I figured it couldn't hurt to try it.  Ammonia is terrible!  I wish I would have had a gas mask when I did this, it was just awful!

Here they were before: (hopefully you can see how bad they were)


So, the next morning, I tried to plug my nose, took them out of the bags took them inside to a sink with warm water and a scrubby and scrubbed them a little bit.  It didn't take very much work to get the stuff off, just a little bit!  Which is not the same that can be said about the stove itself, it was pretty bad, but thank heavens for Comet, I love Comet (powder)!  It is my favorite cleaning product ever! (I think)  It does such a great job!
Here they are after and on the stove in all its glory:

That back burner was a pain to clean and didn't work very well--but its a whole lot better than it was before!
*Angels singing*
I don't think I'll ever do anything with ammonia again, because its just sooooo awful.  But this worked really well!!!  :)

UPDATE 9/17/13:
While this did do a fantastic job cleaning the grills, I don't think I would do it again.  I still have the bottle of ammonia and am not sure how to dispose of it.  We can't put it down the drain because it is not good for septic tanks and I think it is considered a hazardous waste and may contaminate our water supply.  Plus, where we get our water from a well, it would directly contaminate us.  It would probably also not be good for the crops that the farmer is growing around us, which who knows how far that could go.  So, I have to go to the hazardous waste dump around here and get rid of it.  I'm not sure where it is so I have to find that. So, I would not use ammonia like that again.  :(

Yellow Banana Taste Test: Organic vs. Not Organic

Hubby and I sometimes argue about the taste of bananas.  First of all, let it be said, hubby doesn't care for fruit.  Or vegetables for that matter.  My opinion is that Organic bananas have more of a banana-y flavor and taste kind of less plastic-y and have a better texture.  So, (several months ago) we did a taste test to see if we could guess which ones were which.  

Here are the bananas.  The first thing I noticed, even some time after the taste test, the regular bananas kind of went black/brown faster than the organic, which surprised me a little bit.  So, you can see that the bananas are of relatively equal ripeness and both are yellow and not green.


We decided to cut them in half, so that we would each get half of one banana to do the test.  To make them identical, we did the same halves for each person. (if that makes sense)

This is the one that I prepared for hubby.  We put a line down the middle, hubby left the room while I decided which halves of the bananas I wanted to give him, cut the bananas up into slices and remembered which side was which.  I then took them into hubby and he did the same for me.  For the sake of remembering, we wrote on the bottom of the plate very lightly to indicate which side was organic and which wasn't and promised not to look.

Can you tell which one is organic and which one isn't?  Its very slight, but it is possible.  :)

The verdict: inconclusive.  Hubby thought he could taste a difference for just a moment, and then figured he couldn't.  I, still, can taste a difference and prefer the flavor of the organic, but I'm not going to pick organic over regular unless it is cheaper or I feel like it.